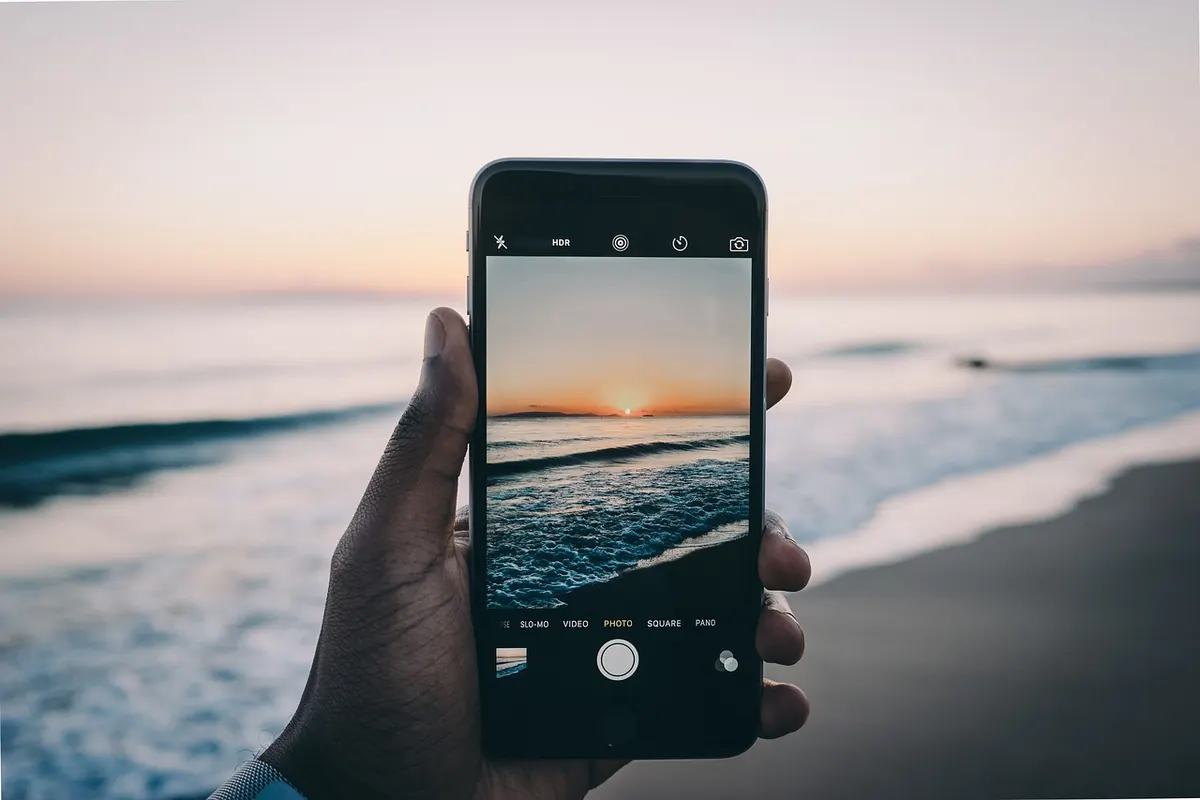
The sky turns the colour of a ripe apricot, the sea goes quiet, and you lift your phone. What comes back is a thin white band above a black rectangle. Everyone's first sunset photo looks like this, and it is not your fault: the gap between the brightest and darkest parts of a coastal sunset is far wider than a phone sensor can hold at once. The good news is that the fix is mostly technique, not gear. Ten minutes of practice at the right moment will do more than any accessory.
Read the light before you touch the shutter
Arrive early. Twenty minutes before sunset, the light is still soft enough to photograph the place itself — the rocks, the path, the person standing at the rail. That is also when you work out where you are going to stand, which is the decision that matters most.
Find out where the sun actually sets. A compass app, or simply watching the previous evening, is enough. On an island this changes quickly: a bay that faces west in June can lose the sun behind a headland by September. Walk the shoreline and look for a spot where the sun will drop into open water rather than behind a hill.
Then check the tide. Wet sand, rock pools and shallow water doubling the sky are the cheapest special effects available, and they disappear at high tide. If the forecast promises a clean horizon, plan for the sun; if there is a bank of cloud sitting low, plan for the light it will throw upward instead.
The settings that actually matter
Most phone cameras are set up well. The trouble is that their defaults are tuned for a evenly lit street, not a burning horizon over dark water. A few changes help.
Clean the lens, and shoot at 1x
Pocket lint and a fingerprint smear will turn every highlight into a soft flare. One wipe with a microfibre cloth at the start is worth more than most editing apps. Then stay on the main lens — 1x, the one labelled with a plain number. The ultra-wide is tempting for a big sky, but it is usually the weaker sensor, it bends the horizon, and it pulls in more of the dark foreground. Pinch-zooming to 5x is worse still: that is digital cropping, and a sunset is exactly the kind of high-contrast subject where the loss shows.
Lock focus and exposure, then pull it down
Tap and hold on the brightest part of the sky until the focus box pulses or a lock icon appears. A slider appears beside it. Drag it down. The sky will deepen into orange and red, and the land will fall into shadow. That is the shot. If you leave the phone to meter the whole scene, it will try to brighten the shadows and blow the sunset into a pale smear.
Leave HDR on, but know what it does
HDR blends several exposures, which keeps both sky and foreground readable. It can also flatten the drama. If your phone lets you choose, keep HDR on for scenes with a lit foreground — a harbour wall, a person, a boat — and turn it off when you want a strong silhouette. Night mode engages automatically as light drops; it works well for sunsets, but only if the phone is completely still.
If your camera offers a raw or ProRAW format, use it for the shots you care about. It gives you more room to pull the highlights back later. If not, don't worry: the JPEG from a well-exposed frame edits perfectly well.
Composition: give the sunset something to do
The sun itself is the least interesting part of most sunset photographs. What makes an image is everything else in the frame: scale, texture, a shape that reads black against the glow. Try these in order and see which suits the place.
- Find a foreground. A rock, a low wall, a drawn-up dinghy, a cluster of agave or pine. Something within three or four metres of you, dark against the light.
- Put the horizon on a third. Low horizon for a big sky; high horizon when the water is doing something worth showing. Turn on the grid to place it, and use the level indicator — a tilted sea is unforgivable.
- Include a person. A figure on the headland gives the sky a size. Turn them into a silhouette by metering for the sky.
- Use reflections. Crouch low over a pool or wet sand and shoot along the surface rather than down at it.
- Leave the sun out. Point the camera 30 degrees away from it and you get coloured cloud, warm sidelight on the cliffs, and none of the glare that makes phone lenses struggle.
- Frame with something. Branches, a doorway, the gap between two rocks. Dark edges hold the eye inside the picture.
Shoot in the native 4:3 ratio and crop later. Cropping in camera throws away pixels you might want.
Holding still when the light is asking you to hurry
In low light the shutter stays open longer, and a half-degree of handshake turns a clean sunset into mush. Stabilise before you start composing.
- Plant your elbows on a wall, a railing or the roof of the car. Or sit down and rest the phone on your knee.
- Use the volume button or a self-timer instead of jabbing the screen. On most phones the volume key fires the shutter without any shake.
- Brace the phone against something solid — a stone parapet is a tripod. A small beanbag or a folded hat works if you have one.
- Exhale, then shoot. Take three frames in a row rather than one; the middle one is usually sharpest.
- If your phone has a long-exposure mode, use it only when the phone is genuinely fixed in place. On a wall, a two-second exposure smooths the sea beautifully. In your hand, it ruins the shot.
Salt is the other enemy. Sea spray dries into a film that softens contrast and scatters light, so wipe the lens every few minutes. Keep the phone in a pocket between shots, and if the glass gets properly crusted, dampen one corner of the cloth with fresh water, wring it out, wipe gently, then dry with the other corner. Avoid rubbing dry salt across the lens.
The ten minutes after the sun goes
Most people pack up the moment the sun touches the water. Stay. For a quarter of an hour afterwards the sky keeps developing: the high cloud turns pink, then violet, and the sea takes on a colour it never has at midday. This is also when the light becomes soft enough for a phone to handle comfortably.
Turn around. The best photograph of the evening is often behind you, where the last light is catching a cliff face or the windows of the village. Then wait for the blue hour, when the sky goes deep and the first lamps come on. That contrast between cool blue and warm artificial light is easier to expose than the sun itself.
Keep the editing light. Pull the highlights down so the brightest part of the sky holds detail, lift the shadows a touch if you want to see the foreground, and add a little warmth only if the image feels cold. A sunset that looks over-processed is more tiring than one that is slightly plain.
A short field checklist
Before you leave: charge the phone, clear some storage, wipe the lens, and check the sunset time and direction. On location: arrive twenty minutes early, decide where you will stand, lock focus and exposure on the sky, pull the slider down, brace against something solid, and take a few frames rather than one. Then put the phone away for a minute and watch. The photograph is better when you have actually seen the thing.
Photo: PublicCo / Pixabay